If you have gone through the first tutorial, you should have the basic structure created. This tutorial will go through the steps on creating a custom respawn well, as well as putting it into a group to work properly.
Other items to be placed in the world follow the same directions. If standard items are used, the customization in the database is not necessary.
Create a Custom Object[]
Open the Mod[]
- Open the Art Manager and select your mod A1: Mod - Select - A1. Now that we have our mod loaded we are ready to import objects so we can customize them.
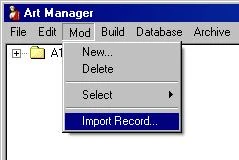
Import a Respawn Well[]
- From the top menu select Mod - Import Record.
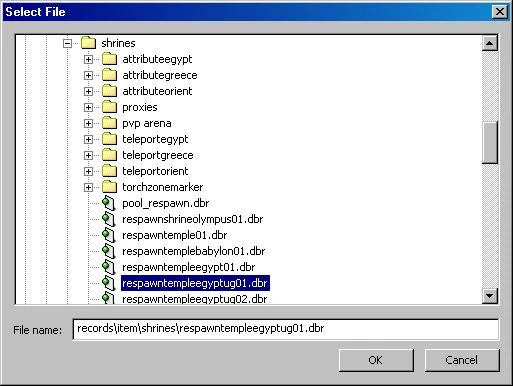
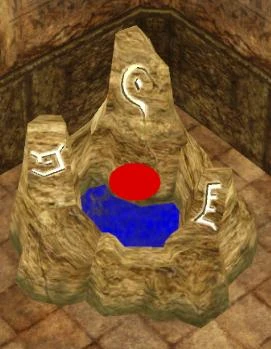
- Open the folders and select the object: records/item/shrines/respawntempleegyptug01.dbr
- Click Okay
- Click the Database tab near the middle of the Art Manager and expand the tree to the item you just imported.

The screen should display a copy of the item respawntempleegyptug01 imported from records. Since we have imported it we are now free to edit it as we please. Rename it and move it to a central folder so we can find all our custom objects easy.
Organize The Records[]
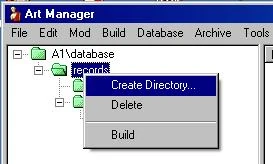
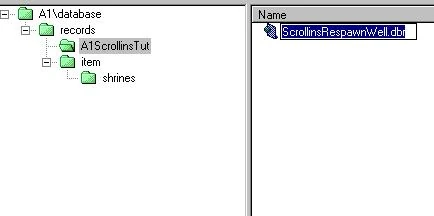
- In your database right click the records folder and select Create Directory
- In the prompt that comes up enter a name of A1ScrollinsTut

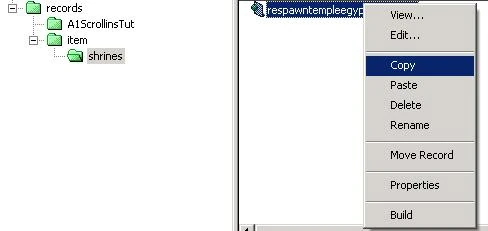
- Now find the shrine we imported under item - shrines, right click it and select copy.
- Select the A1ScrollinsTut folder you made and right click and paste the object in the window to the right.
- right click the object that you pasted into your folder and rename it to ScrollinsRespawnWell.dbr
- You may go back and delete the other record we imported to keep the database clean.
To do that:
- Right click the old shrine under item-shrines
- Delete it
- Delete the two folders after that.
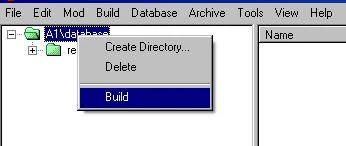
- Build the database so our new folder and item will show up in the editors menus.
- Right click the main folder in Database A1\database
- Select build.
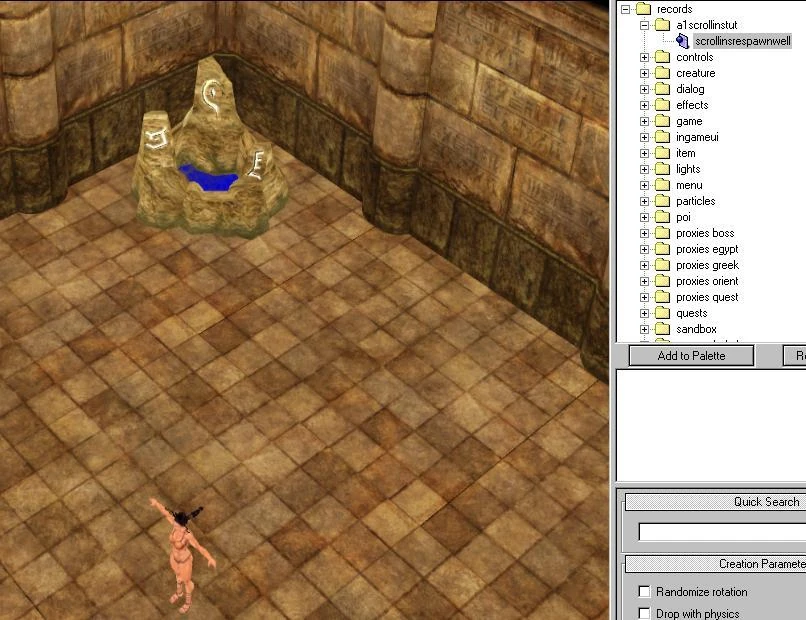
The item is ready to be placed in our world. - Open the Editor and load up mod A1 source - maps ScrollinsTut.wrl.
- From the layout mode screen select the A1level1.lvl and enter edit mode .

|
If your custom objects do not appear in the editor and you have the Immortal Throne installed there is a bug with the editor where it reads the incorrect path for the custom database. When "build"ing your custom database try the following:
C:\Program Files\THQ\Titan Quest Immortal Throne\
This will need to be done each time the database is built.
|
Place your Respawn Well[]
- Select the object tool
- Expand the tree to records-a1scrollinstut- scrollinsrespawnwell
- With the well selected left click in the corner of the level to place it.
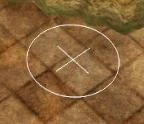
- To move and rotate the object use the transform tool under the object.
- Clicking and dragging the cross in the center will move it.
- Clicking and dragging the ring around in a circle will rotate the object.
- Clicking and dragging between the cross and ring will raise and lower it.
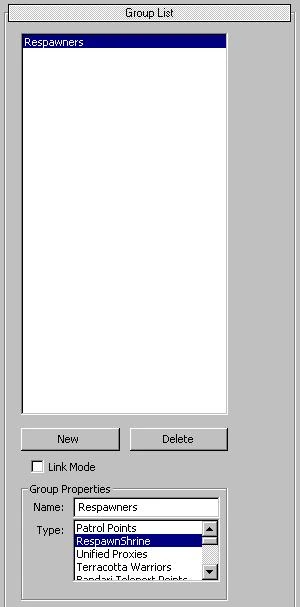
Make a RespawnShrine Group[]
In order for the respawn well to work completely we need to form it into a group and make that group type RespawnShrine.
- Select the group tool .
- On the right you see the group options.
- Select "New"
- Rename it to Respawners and select type RespawnShrine.
- With that group name selected click the well that you placed in the level. You should see a small red circle appear above it.
- Save all under File- Save All and close the editor.
- Open the Art Manager.
- Select your mod: Mod-Select-A1
- Compile by clicking Build- Build at the top (or by pressing F7). Then load up the map and test it out in Titan Quest the respawn shrine should work properly once activated.
Next[]
In the next tutorial a customized monster is added.