Titan's Quest isn't inherently set up to have doors that can be unlocked by keys. However, the pieces are all there to complete the task it only takes some customization.
Customizing the Parts[]
Modstrings.txt[]
There are a couple of entrys that can be placed into your modstrings.txt file:
- the flavor text for the key (the text seen when the item is viewed in the inventory)
- the description of the key (the name of the item, seen in the World when the "Alt" key is depressed)
- the description of the door (the name / description of the door)
- the description for the locked door (text indicating that the door is locked. May be bugged as it is shown in game regardless of the door's locked status)
- Open the Art Manager and select your mod
- Click on the Sources - text file folder.
- Right click on the modstrings.txt file and select autocreate asset
- Open the file to edit it and type the following:
MyDoorKey=This key will open the door.
MyDoorKey_text=This key is old and heavy. It looks to be well worn.
MyDoorDescription=A large door.
LockedDoor=This door is locked and requires a key.
- Save the file.
Creating the Key[]
There are no "keys" that are used in the main game, so this will be one piece that is completely fabricated.
Creating the Inventory Icon[]
- Open your favorite image editing program and create a new document to the size you want your key:
- 1 by 1 : 32 pixels by 32 pixels
- 1 by 2 : 32 pixels by 64 pixels
- 2 by 1 : 64 pixels by 32 pixels
- 2 by 2 : 64 pixels by 64 pixels
- Create your image
- Use the alpha channel for the background of your icon
- Save the texture to C:\Documents and Settings\YOUR USER NAME HERE\My Documents\My Games\Titan Quest\Working\CustomMaps\YOUR MOD NAME HERE\source\Textures as either .psd or .tga.
If you use .tga format ensure that the alpha channel is saved, i.e. 32 bit (24 for color, 8 for transparency)
If you have changed the location of your My Documents folder, your path will differ accordingly

Importing the Icon[]
- Open the Art Manager and select your mod
- Open the "Textures" file folder. The image you saved should be there.
- Right click the name of the image and select "Auto Create Asset"
- Select "texture" and click Okay
- Select DXT5 as the texture type and click okay
- Build your database by pressing F7
Customizing the Item[]
As of patch 1.15, there are no tools to modify the item mesh, the 3D image of how the item looks in the world. Therefore, a current item must be used to "emulate" the key. Amulets work nicely because they are small and hard to recogize individually in the main world. Any item will do, but this tutorial will continue using an amulet.
- In the Art Manager, import database record: records\item\questitems\ji_dowry necklace.dbr

- Click the "Database" tab
- Copy the entry to another location
- Rename it to key
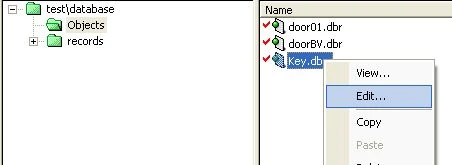
- Right click on the entry to edit it
- Under "Header" you can change the FileDescription string to any description you want. This shows up in the Art Manager and is not critical.
- If you didn't use a quest item, you need to change the class to QuestItem and then save and build your database. This has not been tested if it will work.
- Under "Quest Item Config" change bitmap to the texture you designed and imported at the begining of the tutorial. This is the inventory icon
- In the "Item Paramerters," the itemText field can be a pointer to a tag in your modstrings.txt. This is flavor text for the item in game. Change it to MyDoorKey_text, the flavor text typed into modstrings.txt
- Make sure itemClassification is Quest, itemCostScalePercent is 200, and cannotPickUpMultiple is 1.
- In the "Actor Variables," the description field is another pointer to your modstrings.txt This is the item description shown when the "Alt" key is pressed in game. Since it is a quest item, this text will be in purple. Change this field to MyDoorKey, the item description typed into modstrings.txt at the beginning of this tutorial.
- Save your item
- Build your database by pressing F7.
Modifying the Door[]
There are very few doors that actually work in game (most are setdress). Here is a list that have been verified to work:
| records\sceneryegypt\structure\building\city\egyptcitygatethebesdoors01.dbr |
| records\underground\babylon\babylontemple\babylontemple_portcullis.dbr |
| records\underground\egypt\giza\gizadoorblue.dbr |
| records\underground\egypt\giza\gizadoorgreen.dbr |
| records\underground\egypt\giza\gizadoorred.dbr |
| records\underground\egypt\thebes\dgn_door01.dbr |
| records\underground\egypt\thebes\dgn_door02.dbr |
| records\underground\egypt\thebes\thebesdoor.dbr |
| records\underground\egypt\valleyofthekings\dgn_door01.dbr |
| records\underground\greece\athens catacomb set\athenscatacombf_doors.dbr |
- In the Art Manager, import one of the above doors.
- Click the "Database" tab.
- Copy the entry to another location
- Rename it to "Door"
- Right click on the entry to edit it

- Only a couple of things need to be changed:
- Under "Config" change lockedTextTag to LockedDoor (a pointer to modstrings.txt)
- Under "Config" change locked to 1
- Under "Actor Variables" change description to MyDoorDescription (a pointer to modstrings.txt)
- Save the database entry
- Build the mod by pressing F7


Bounding Volume[]
A bounding volume is used to unlock the door. These are found in the "triggers" portion of the object tool pallet.
- In the Art Manager, import the following record: records\triggers\quests\testquestregion.dbr
- Click the "Database" tab.
- Copy the entry to another location
- Rename it to "Door01BV." Nothing else needs to be changed
- Build the mod by pressing F7
Creating the Quest Coding[]
- Open the Quest Editor and select your mod. (This can sometimes take a long time to load.)
- Select File-New Quest Document (Ctrl+N)
- There should be a File "New Quest 1" on the left. Right click this and select Add Quest Step
- Select the new quest step (on the right)
- Click the Add Trigger button
- Under the trigger seclect Conditions and click the New Condition button
- Select Enter bounding volume as the condition
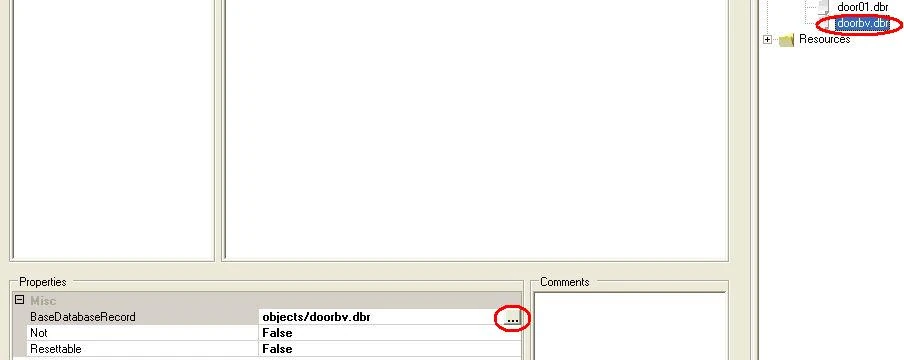
- On the far right, there is a pallet similar to the object tool. Find the bounding volume that was changed and select it. At the bottom, click the elipsis that corresponds with BaseDatabaseRecord. The location of the bounding volume should appear in the blank.
- Click the New Condition button again , adding another condition to the same trigger.
- Select Has item X as the condition.
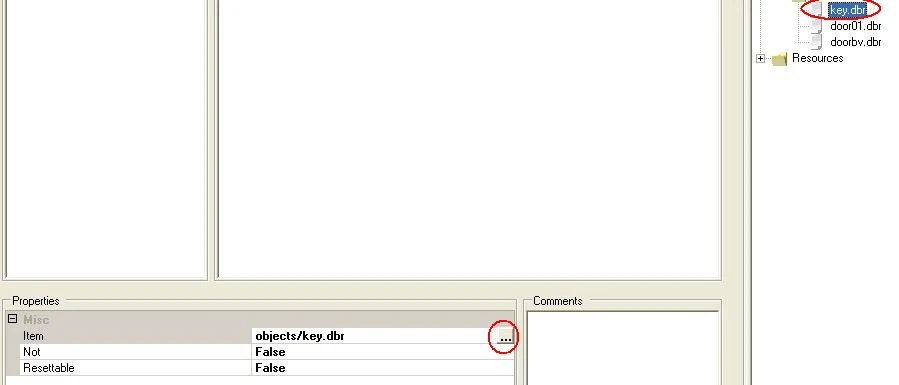
- Find the "key" item that was imported on the pallet, select it and click the elipsis next to the Item field. The location of the key should appear in the blank.
- Click the Add new action button
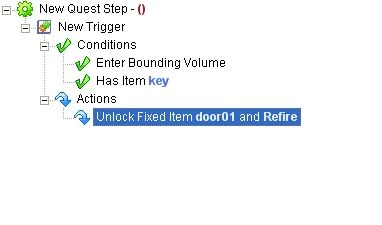
- Select Unlock Fixed Item X and Refire as the action.
- Find the door that was imported on the pallet, select it, and click the elipsis near the FixedItem field. The location of the door should appear in the blank. Your quest should look similar to the picture.
- Save the quest to C:\Documents and Settings\YOUR USER NAME\My Documents\My Games\Titan Quest\Working\CustomMaps\YOUR MOD NAME\source\Quests
- Close the Quest Editor.
Finishing Up[]
- Open up the Art Manager and select your mod.
- In the sources - quests folder, find your quest file.
- Right click it and select Auto Create Assets.
- Build your mod by pressing F7.
- Open the World Editor and select your mod.
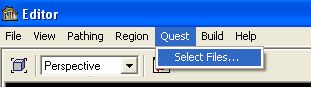
- Under the Quest menu, click Select Files...
- Find and select your quest from the list (there should only be one, unless you have other quests in your mod).
- Click Add, and then Ok
Conclusions[]
That should be everything necessary to get the door to be locked and have a key needed to unlock it. In the World Editor you will need to place the door and the bounding volume for the door on top of it. The quest should unlock the door when the player enters the bounding volume and has the proper key. The key can be hidden on a monster, in a chest or placed in the world itself.
If you are planning on multiple doors and multiple keys, some sort of naming convention should be decided upon before making all the pieces. Each door will need a spearate door, key, bounding volume and quest (unless you want one key to open multiple doors).